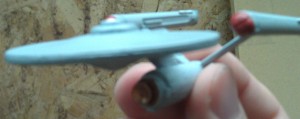
Making an Enterprise display stand.

Even though I finished the A and B models in April, I only just now got around to writing it up. This was because the kit didn’t come with a stand, and while I knew what I wanted to do for a display, I couldn’t figure out how to build it. So the models ended up going back in their box and sitting on a bookself and I didn’t have the interest needed to go through all of the photos I took to write the posts.

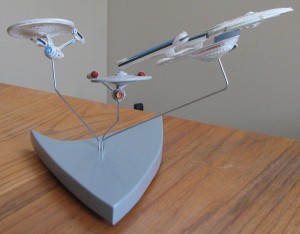
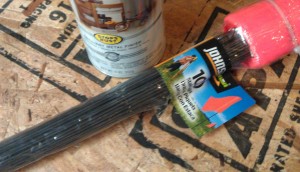
Recently though I got an idea from my dad. He’s been making remote controlled model airplanes from foam and was using the wires from yard stakes for wheel and wing struts. These happened to be exactly what I was missing in order to make the stand I wanted.

Clip the flag off the end, easily bendable, mall enough to work with the Original Series model, strong enough to hold their shape. I also spray painted them with silver appliance enamel to pretty them up a bit.

One of the clipped wires also made a good drill bit so that the holes I put in the bottom of each model was an exact fit.

For the actual base I found a black and white Starfleet emblem online, printed it out, and glued it to a piece of pine with rubber cement. I used a jigsaw freehand to cut out the symbol and then sanded the curves and the pattern off the top.


I really couldn’t be happier with how it turned out, especially since that’s the first time I’ve cut a pattern like that. All of the woodworking I’ve done before now has been cabinets and picture frames.

The next step was to get a wire bent and mount one of the models to see if it would work.

I drilled two more holes in the base to check out all three ships, then it was time for painting. I may have over done it a little bit, but in the end I used two coats of white primer, three coats of grey paint, and two coats of clear lacquer.


I made a lot of mistakes on the first model, a few less on the second, and a few less on the third. But seeing them all together like this and sitting on my desk, I don’t notice any of them.
  

Finishing the Enterprise-A

After the Excelsior, the Enterprise-A was much easier. Smaller model and less decals.


There were still some tricky parts, specifically the nacelles again, but having a smaller model actually made them easier to get applied and aligned without any tears.


The finished ship, my only regret is the mess I made of the black around the Bussard collectors (which the decals didn’t cover at all). I bought a second kit to make eventually, I think when I do that I’ll not worry about painting that part or I’ll try taping it.


And here’s the trio of Enterprises, I love seeing the scale differences.

Finishing the Enterprise-B

After finishing the Original Series Enterprise, I realized that I needed some proper tools before tackling the Enterprise-B. I also got an excellent tip from PoisonFox about setting solution.


Applying the decals to the B was quite a bit more challenging than the Original. First there were just a lot more decals. The Original had thirty-six (Clerks!) where the B had sixty-three, and I just realized that those numbers are the transposed versions of one another. Weird.

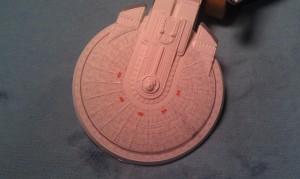
Besides just the amount, the Excelsior also had some really large decals. The saucer section’s top is three pieces that have to line up together:


The nacelles’ each had two, one inside and one outside, that had to match up across the top and wrapped around both ends:


There were also some sections where decals are applied as multiple layers. For instance the bottom of the saucer had the base decals with phaser strips and ship name layered over the top.


The biggest lesson learned from doing decals on this model was to pace myself more. I ended up doing all the decals over two marathon sessions of about three hours each, and I made most of my mistakes during the tail end of each one. All in all, I’m very happy with how the ship turned out, and any mistakes I notice now I consider good lessons for the next model.

One last cool thing about doing these models, I’ve gained a new appreciation for the increase in scale from one incarnation of the Enterprise to the next.


Enterprise-D and NX-01

Just wanted to share some quick shots of other ships I’m getting started on and/or working up to.

The Enterprise-D will be the largest model I’ve worked on yet, so the detail paining and assembly should be easier. Although, it may just provide a different set of challenges. The decals for this one will likely be more difficult.

The NX-01 is my favorite and the model I’m working up to. It’s a 1:1000 scale so it’ll be the biggest of any of the models I’m planning to work on. I’ve also bought a painting mask for it so I’ll be able to skip doing a lot of the larger decals.


Assembling the Enterprise-A

After finishing spray painting the base colors for the NCC-1701-A, it was time to build the sub-assemblies, do some detail painting, and then attach the saucer to the engineering hull.


I’m not particularly proud of black highlights on the front of the nacelles, but I’m hoping that the decals that cover most of the part will help clean up the edges.

The Constitution-class refit is going to be staying in spacedock for a while, I’m planning to get back to the Excelsior model and do the decals next. After the TOS model’s tiny decals I want to practice on a larger model and the A is about midway between the two.

Finishing the NCC-1701

Finally finished my TOS era Enterprise.  When last I mentioned her, I had completed painting and assembly with several significant mishaps, also known as learning experiences. The completed ship was a little misshapen but turned out better than I had expected. But it wasn’t done as I still had a sheet of decals to apply, something I was dreading doing.

Turns out I was worried about the wrong things. My childhood memories of model building include lots of instances of getting stickers applied crooked and then torn or bent as I tried to peel them off and reapply them. Modern models do it a little differently and it wasn’t clear until I started how they really worked.

The instructions state you need to cut a decal from the sheet and then soak it in water for about 20 seconds. Then you slide it from the backing paper and apply it. For most people, that might sound pretty clear but for me it was confusing. Do I lay the whole thing on the model and then slid the paper out from under? How would I pull on the backing paper and still keep the decal from moving? The application process sounded pretty iffy. Thankfully the reality of applying the decals was much simpler.

After trimming a decal from the sheet with a knife, I dropped cut piece in water and waited until I could slide the decal around on the sheet. Too long and it detaches and floats, which isn’t too bad but some decals are pretty delicate. Apply a decal is super easy, just put it next to where you want it to be and slide it off of the backing paper onto the spot. The best part is a decal won’t stick until it dries, so I was able to shift them around as much as needed to make sure everything was placed and aligned correctly.

The one thing I hadn’t counted on was the extremely small size of some of the decals. For instance there were small red and green dots for the top and bottom running lights of the saucer section. These were about the size of a pin head. Not having a set of tweezers or probes, I found that toothpicks I’d bought for applying glue worked great to manipulate even the tiniest decals. Plus the decals didn’t stick to the wood like they did to my fingers.

One adjustment I made was for the windows on the bridge dome. The decals wouldn’t lay quite right and they were just a series of tiny white dots anyway, so I decided to paint them on instead.

You can see in the front view that the nacelles are not aligned within Starfleet tolerances.

Overall, I’m pretty happy with how she turned out. The size of the model made it a good cheap starter project, but it also required a lot of skill to handle all of the tiny parts which made if more of a challenge than I expected and thereby much more educational.  I’ve really learned a lot from this first model (or first in almost thirty years), and I’ve already seen my Enterprise A and B attempts turn out better in the painting and assembly stages. So as a test, I bought a second kit of the 1:2500 TOS, A, and B models and started on version two of the 1701.

Painting the Enterprise-A

After my experiences with gluing a model together first (see here and here), before I even opened the plastic on the Enterprise A, I got smart and searched for model painting videos on Youtube where I found an excellent suggestion. Why not remove the parts from the sprues so I could clean up any edges, but then tape them to a board for painting, and glue them together after the priming and base paint was done. Genius!

Enterprise A in Spacedock

I’m glad that I did this model the last of the three since it’s smaller than the Excelsior, although a bit larger than the original Enterprise. I haven’t decided yet if I’ll do any of the detail painting before assembly or not, but there’s not much as much painting required as there was on either the original or Enterprise B.

Painting the Enterprise-B

The mistakes that I learned from on the original Enterprise went a long way to helping the Excelsior, Enterprise B, turn out better. It also helps that this model is larger and includes a post on the bottom for a stand so I had some way of mounting it while painting. I took the MacGyver approach and made a base out of plywood and a decking nail.

There’s also a bit of detail painting needed on this model as well, although less actually than on the first one (means more decals). Just the neck, deflector, and impulse engine housings in a medium gray, impulse engines in red, and the shuttle bay in a light gray.

I got a little sloppy with the red, but it was easy to correct after letting it dry over night.

Boldly trying yet another new hobby.

Honestly, pretty much the last thing I needed was an additional claim on my time and money. Yet I’ve somehow found myself waist deep in plastic model kits for Star Trek ships.
It began innocently enough, a few weeks ago I saw on Twitter that StarTrek.com was having a sale. I’d been wanting to pick up a t-shirt or two and figured I’d see what else they had. When I found the models page and saw that the Enterprise E was on sale, I ordered one. The last model I put together was a General Lee when I was ten, so I’m way out of practice. The listing said no glue or paint required though and I figured it would be no problem.

Fast forward a bit and I got the model, assembled it and started looking over the decal directions. This is when I realized two things. First there was no decal for the impulse engines at the back of the saucer. Second there were an awful lot of decals. It turns out that there is some painting needed if you want the model to match the picture on the box, and I really wanted it to match.

That weekend I took my son and made a trip to the local hobby shop to look around at the paints and see if they had any cheap model kits for me to practice on. I figured I needed to work up to a Sovereign-class ship. I ended up finding the perfect thing too.

Not only was this kit inexpensive, but it had three tiny ships to practice on. Plus, neither the original Constitution nor the Excelsior are ships I especially like, so if I screwed them up badly I wouldn’t feel bad about throwing them out.

Over the last few evenings, I’ve learn quite a bit about what order to do things in, or more specifically what order not to do things in, and how to correct mistakes. Well mostly correct them.

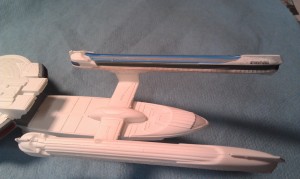
Stupidly, I laid out my Original Series model on a shop towel and laid down the paint way too heavily. Not a good idea. I ended up with a real mess had to strip off all of the paint, breaking the nacelles, dish, and struts off in the process. I managed to get the pieces up and glued everything back together, but the nacelles are a bit crooked and I don’t see a way to fix it. Despite the issues I had, it didn’t turn out too awful and I think the detail painting I did turned out pretty well.

Wrong
Better


She'll break apart at warp speed.

She’s not done yet though, I still need to add the decals which will be an entirely new learning curve to tackle.