Building a Quad – Frame Change

After my first real flights ended with a broken battery lead and a fried flight controller and messed up video transmitter, I decided that since I was going to have to take everything apart anyway, I might as well change the frame I was using. While I liked the Phreak it really wasn’t suited well to having a four high stack, and rather than getting taller standoffs and screws to raise the top plate I decided to switch to an Acrobrat.

An Acrobrat is a 3″ frame designed with three mounting positions and a top-mounted battery, where the Phreak only had one mounting position and a bottom-mounted battery. That meant I could separate out the boards in the flight stack and have the camera and HD board up front, the flight controller and ESC in the middle, and the VTX and receiver in the back. Having the battery on top also meant I wouldn’t be landing on it.

Since I was moving to a new frame, I also got a new set of 3d printed accessories from Brain3d. They had a nice kit that included arm guards, front bumpers, and a nice rear mount to handle both the VTX and receiver antennas.

Of course switching the frames meant taking everything off of the original and moving it over to the new one. But more than that, I had to lengthen the motor wires since the Acrobrat’s layout had a wider length from where the motors mounted to the ESC on the center stack. Fortunately I had saved all of the wire I’d originally trimmed, so it wasn’t too difficult to solder and heat shrink extensions on and retrim and solder back onto the ESC. I also decided to add a capacitor to the build to help smooth out any electrical noise, and taped it down to one of the arms.

With that done I was back to the original repairs I would have needed anyway. I soldered the wiring harnesses back up to the new flight controller board and reseated it on top of the ESC. Then I got the camera and VTX both hooked back up and mounted. The receiver I ended up loosely zip tying to the VTX, which I’m not sure was a good idea even with the Kapton tape to keep them electrically isolated but I haven’t tried changing that around yet.

While it didn’t take me as long as the original build it was still a few hours worth of work to move all of the electronics over to the new frame. I have to say that it was worth it though. It was much easier to fit everything in the Acrobrat than it was the Phreak, which just wasn’t designed to have that extra board in it for HD capture from the FPV camera.
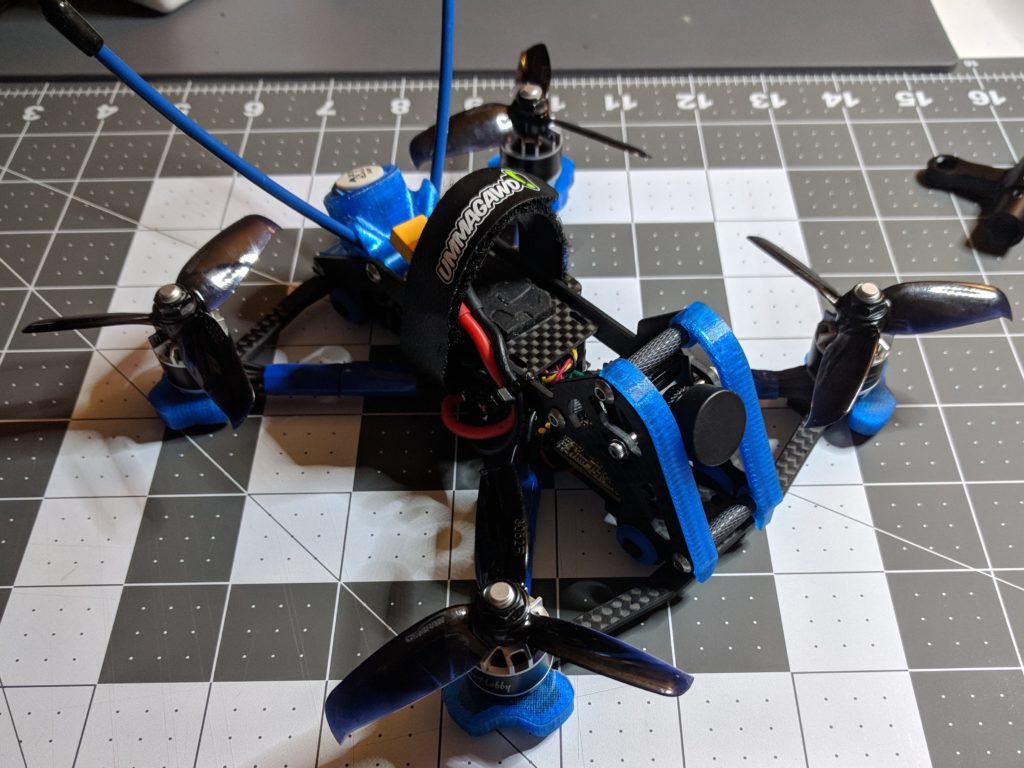
Battery leads securely zip tied to the side-plate of the frame.

It took me a while to get to this point, but I’m pretty happy with the second iteration of my 3″ quad build. I have to put a 60% throttle cut on it in order to fly it around my yard, but that power is nice to have when I go to my in-laws farm or take it to a nearby park.

Building a Quad – First Flights and a Mistake

Can you spot the problem?

Having finished building my first quadcopter, I took it outside for a hover test and maiden flight.

For the hover test, I basically treated it like a live grenade. Setting the quad up on the driveway, gingerly plugging in the battery, and then sprinting away. Which is comical looking back on it now, but at the time I really had no idea what to expect. Before then I had already done motor tests without the props on, but something about having three inch spinning plastic blades had me erring on the side of caution. I armed the quad and throttled up until the quad lifted off of the ground and then I held it there for a few seconds before setting it back down. It didn’t flip out or anything, so it was time to actually fly it.

With my goggles on, I rearmed the quad and took it for a short maiden flight around my front yard. It was exhilarating but terrifying as well. At the time I just assumed it was because I was going from a small quad with brushed motors to a bigger one with brushless motors, and that I would get used to it after a period of adjustment. Regardless the maiden flight was good, although I didn’t really get a chance to push the motors much. I had wrapped up my build late and was pushing sunset as it was. I didn’t think it would be smart to take risks with a brand new quad especially when I wasn’t comfortable yet with the new size and additional power.

That weekend, we had a trip up to my in-laws farm for the weekend, which excited me since I’d have the chance to fly someplace where I wouldn’t have to worry about space or people or traffic. Although I did realize shortly after take off that I hadn’t paid attention to where the overhead power lines were, so I had to land and take my goggles off briefly to look around and map out what areas I wanted to stay away from. I had six batteries charged that I was looking forward to using.

The first flight went pretty well, and I was enjoying really getting to go full throttle with it. I was still pretty terrified of crashing it before I’d really gotten a chance to enjoy it much, so I was playing it safe and not trying out any rolls or flips or dives. But it was still a lot of fun to race over the fields and along the fences.

The second flight was great too. I was starting to relax a bit more, although not enough to start trying any tricks. It was really enough of a learning experience to adjust to the bigger weight and different type of motors, than to worry about doing any fancy flying.

Sadly there wasn’t a third flight.

I don’t know if it was the way I unplugged the battery after the second flight, or if it was a bad solder joint that was weakened by the vibrations during flight. But the red wire on the battery lead had come loose from positive battery pad and I didn’t realize it until I plugged the third battery in and I heard a popping noise. At first I didn’t realize what had happened so I unplugged the battery and plugged it back in again. Which is when I noticed that the red wire was loose from the pad, and quickly yanked the batter again.

I hadn’t release any magic smoke, and there was no visible damage to any of the electronics. I figured the electronics were fine and I would only needed to resolder the lead back onto the pad in order to have the quad working again. Of course it turned out to be a bit more of a struggle than that.

Once I got home, I resoldered the wire and plugged in the quad, but nothing happened. I then tried plugging it into USB and still couldn’t get any life from the flight controller. Despite there being no visible damage to the flight controller there was a short in the board somewhere. It turned out that while the ESC board was fine both the flight controller and the VTX were shot and had to be replaced. It was a $60 reminder about something I’d forgotten to do when building the quad, zip tie my battery leads.

In all of the buld videos I’ve seen the person doing the build always zip ties the leads to the frame after getting them soldered. This is incase the battery gets ejected in a crash that it won’t rip the pads right off the the board. Or in my case so that the joint isn’t getting pulled on. Even if it had been a bad solder join, had I zip tied the wires in place then it wouldn’t been moving around and possibly not even ruined any of the electronics.

Going back and looking at pictures from the original build, I actually think the ground wire joint looks worse than the positive does. The other thing I should have done better here was solder the wires at an angle so they were coming out along an arm without any sharp bending.